The best method of learning is just learning by doing. I decided that I will document my journey with Data Science and Machine Learning with Python.
Installation of Anaconda
To download Anaconda we are going to Anaconda website. For the purpose of this tutorial, we are going to download Anaconda for Python 3.7. There are available GUI installers or compressed packages for Windows, Linux, and MacOSX. If you decided on GUI installer for MacOSX, after installation you will need to modify your PATH environment variable which contains a colon-delimited list of system directories, which are used for searching executables.
In my case I added such line to my ~/.zshrc file (because I’m using Zsh, most likely you will use Bash shell then you can add this line in ~/.bashrc):
export PATH="$HOME/anaconda3/bin:$PATH"
To verify that path was set correctly, please execute such command in newly opened terminal (to be sure that PATH changes were picked up)
$ conda --version
conda 4.5.7
Updating of conda CLI
The version may differ from a version I had, to ensure that you have most recent one you can trigger an update of conda cli:
$ conda update conda
conda update conda
Solving environment: done

## Package Plan ##

  environment location: /Users/andrzejsliwa/anaconda3

  added / updated specs:
    - conda


The following packages will be downloaded:

    package                    |            build
    ---------------------------|-----------------
    conda-4.5.11               |           py36_0         1.0 MB

The following packages will be UPDATED:

    conda: 4.5.4-py36_0 --> 4.5.11-py36_0

Proceed ([y]/n)? y


Downloading and Extracting Packages
conda-4.5.11         |  1.0 MB | ########## | 100%
Preparing transaction: done
Verifying transaction: done
Executing transaction: done
we can verify that conda cli was updated:
$ conda --version
conda 4.5.11
Ok, we just verified that we have installed conda properly and we have most recent version.
Creating and Managing multiple environments
When you are working with multiple projects, very often you would like to be able to run different Python or libraries versions. Fortunately conda have integrated virtualenv, which lets us keep python environments separately for each project.
To create our first environment lets execute such command
$ conda create --name example_env numpy
Solving environment: done

## Package Plan ##

  environment location: /Users/andrzejsliwa/anaconda3/envs/example_env

  added / updated specs:
    - numpy


The following packages will be downloaded:

    package                    |            build
    ---------------------------|-----------------
    python-3.7.0               |       hc167b69_0        16.3 MB
    mkl_fft-1.0.6              |   py37hb8a8100_0         137 KB
    sqlite-3.25.2              |       ha441bb4_0         2.3 MB
    numpy-1.15.2               |   py37h6a91979_1          48 KB
    intel-openmp-2019.0        |              118         1.0 MB
    mkl_random-1.0.1           |   py37h5d10147_1         335 KB
    setuptools-40.4.3          |           py37_0         555 KB
    openssl-1.0.2p             |       h1de35cc_0         3.4 MB
    readline-7.0               |       h1de35cc_5         393 KB
    tk-8.6.8                   |       ha441bb4_0         3.2 MB
    numpy-base-1.15.2          |   py37h8a80b8c_1         4.0 MB
    pip-10.0.1                 |           py37_0         1.7 MB
    certifi-2018.8.24          |           py37_1         139 KB
    mkl-2019.0                 |              118       154.4 MB
    ca-certificates-2018.03.07 |                0         124 KB
    wheel-0.32.1               |           py37_0          35 KB
    ------------------------------------------------------------
                                           Total:       188.1 MB

The following NEW packages will be INSTALLED:

    blas:            1.0-mkl
    ca-certificates: 2018.03.07-0
    certifi:         2018.8.24-py37_1
    intel-openmp:    2019.0-118
    libcxx:          4.0.1-h579ed51_0
    libcxxabi:       4.0.1-hebd6815_0
    libedit:         3.1.20170329-hb402a30_2
    libffi:          3.2.1-h475c297_4
    libgfortran:     3.0.1-h93005f0_2
    mkl:             2019.0-118
    mkl_fft:         1.0.6-py37hb8a8100_0
    mkl_random:      1.0.1-py37h5d10147_1
    ncurses:         6.1-h0a44026_0
    numpy:           1.15.2-py37h6a91979_1
    numpy-base:      1.15.2-py37h8a80b8c_1
    openssl:         1.0.2p-h1de35cc_0
    pip:             10.0.1-py37_0
    python:          3.7.0-hc167b69_0
    readline:        7.0-h1de35cc_5
    setuptools:      40.4.3-py37_0
    sqlite:          3.25.2-ha441bb4_0
    tk:              8.6.8-ha441bb4_0
    wheel:           0.32.1-py37_0
    xz:              5.2.4-h1de35cc_4
    zlib:            1.2.11-hf3cbc9b_2

Proceed ([y]/n)? y


Downloading and Extracting Packages
python-3.7.0         | 16.3 MB   | ########## | 100%
mkl_fft-1.0.6        | 137 KB    | ########## | 100%
sqlite-3.25.2        | 2.3 MB    | ########## | 100%
numpy-1.15.2         | 48 KB     | ########## | 100%
intel-openmp-2019.0  | 1.0 MB    | ########## | 100%
mkl_random-1.0.1     | 335 KB    | ########## | 100%
setuptools-40.4.3    | 555 KB    | ########## | 100%
openssl-1.0.2p       | 3.4 MB    | ########## | 100%
readline-7.0         | 393 KB    | ########## | 100%
tk-8.6.8             | 3.2 MB    | ########## | 100%
numpy-base-1.15.2    | 4.0 MB    | ########## | 100%
pip-10.0.1           | 1.7 MB    | ########## | 100%
certifi-2018.8.24    | 139 KB    | ########## | 100%
mkl-2019.0           | 154.4 MB  | ########## | 100%
ca-certificates-2018 | 124 KB    | ########## | 100%
wheel-0.32.1         | 35 KB     | ########## | 100%
Preparing transaction: done
Verifying transaction: done
Executing transaction: done
#
# To activate this environment, use:
# > source activate example_env
#
# To deactivate an active environment, use:
# > source deactivate
#
example_env is a name of our environment, numpy is a name of a base package used to create an environment
By default it will install Python in the version which you downloaded with Anaconda, in my case it is 3.7
If you wish change python version when you are creating a new environment you can make it by providing python parameter:
$ conda create --name example_env python=3.5 numpy
As we see in a result of execution now, we are able to activate and decativate our newly created environment
Let’s check it, by activating and verifying that we have properly installed NumPy:
$ source activate example_env
$ which python
/Users/andrzejsliwa/anaconda3/envs/example_env/bin/python
Like you see after activation, we are using python directly from our environment. Just for explanation,
activation of the environment also changing searching PATH
Lets check if NumPy is installed and available
$ python
Python 3.7.0 (default, Jun 28 2018, 07:39:16)
[Clang 4.0.1 (tags/RELEASE_401/final)] :: Anaconda, Inc. on darwin
Type "help", "copyright", "credits" or "license" for more information.
>>> import numpy as np
>>>
There was no error. We are on our way.
Interactive Environment - Jupyter
The next step will be installing amazing interactive environment: Jupiter
$ conda install -c anaconda jupyter
Solving environment: done
...
Let’s add another package to our activate environment (make sure that you activated it before)
$ conda install matplotlib
Solving environment: done
...
We will use matplotlib in jupyter to show you benefits of the interactive environment.
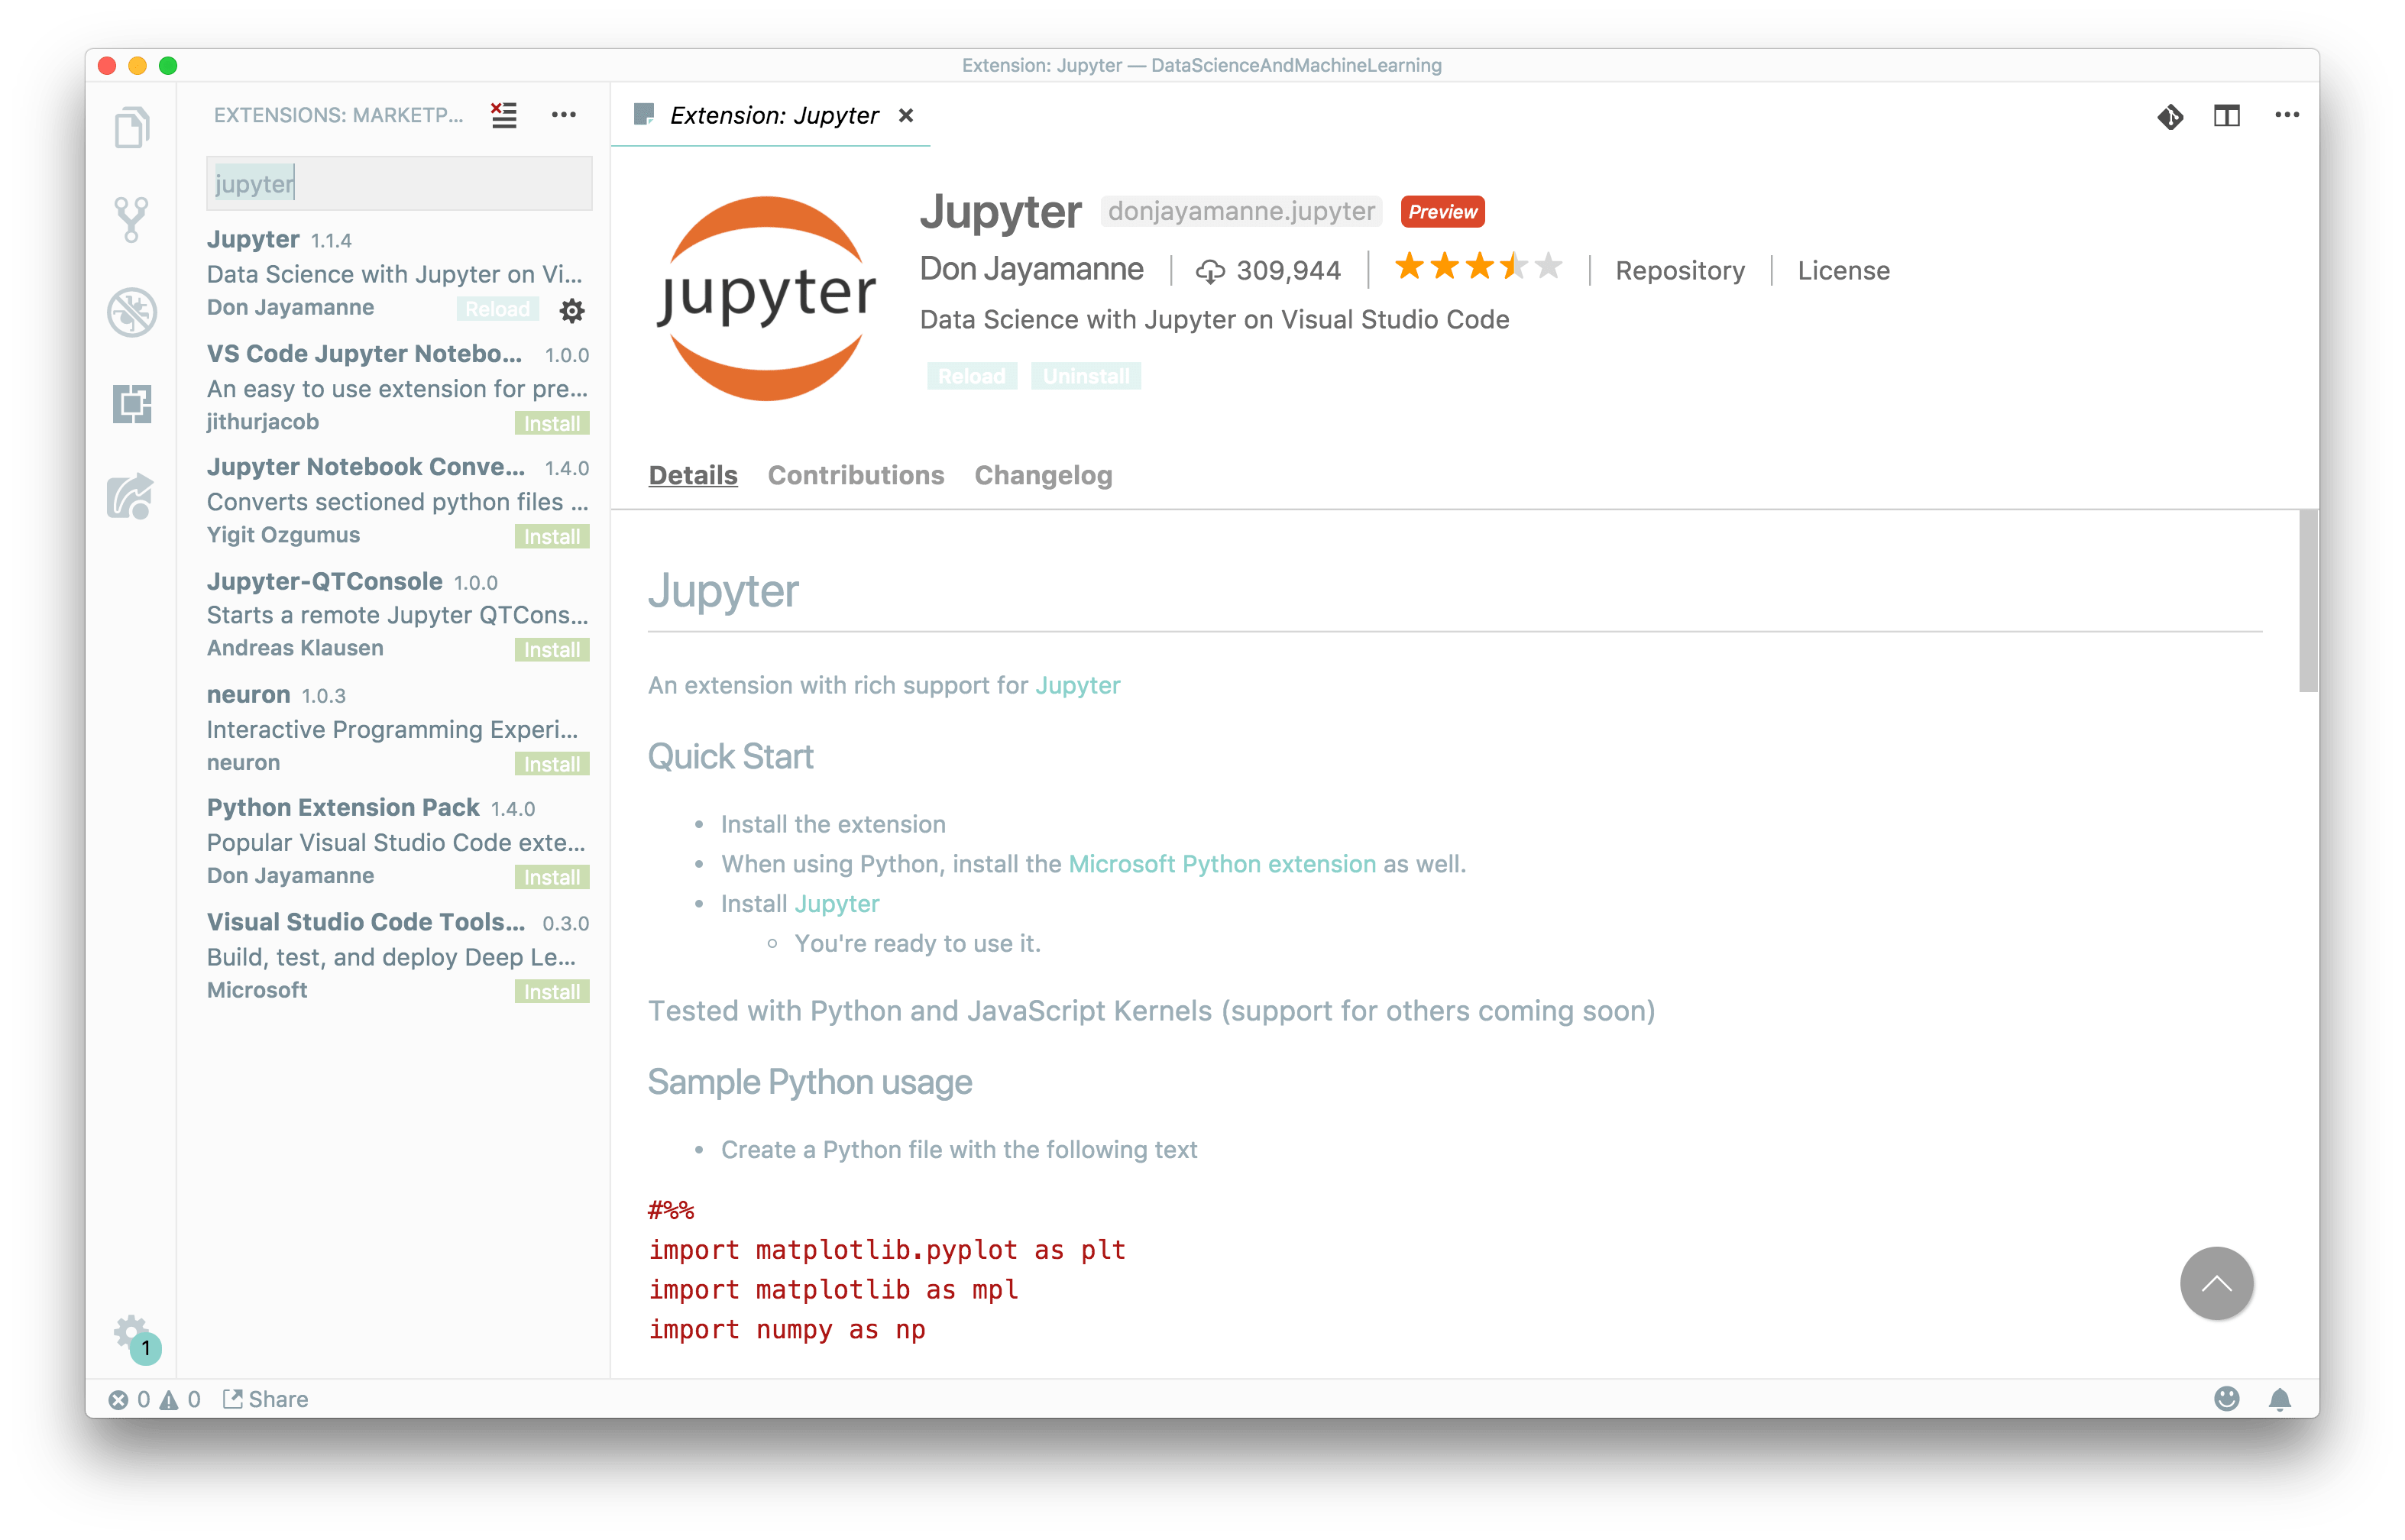
Installation and configuration of Jupyter plugin on Visual Studio Code editor
As next step I strongly recommend the installation of Visual Studio Code and dedicated plugin for Jupyter:
After reloading editor, you will be able to run jupyter directly from Visual Studio Code:
We need to setup an editor environment:
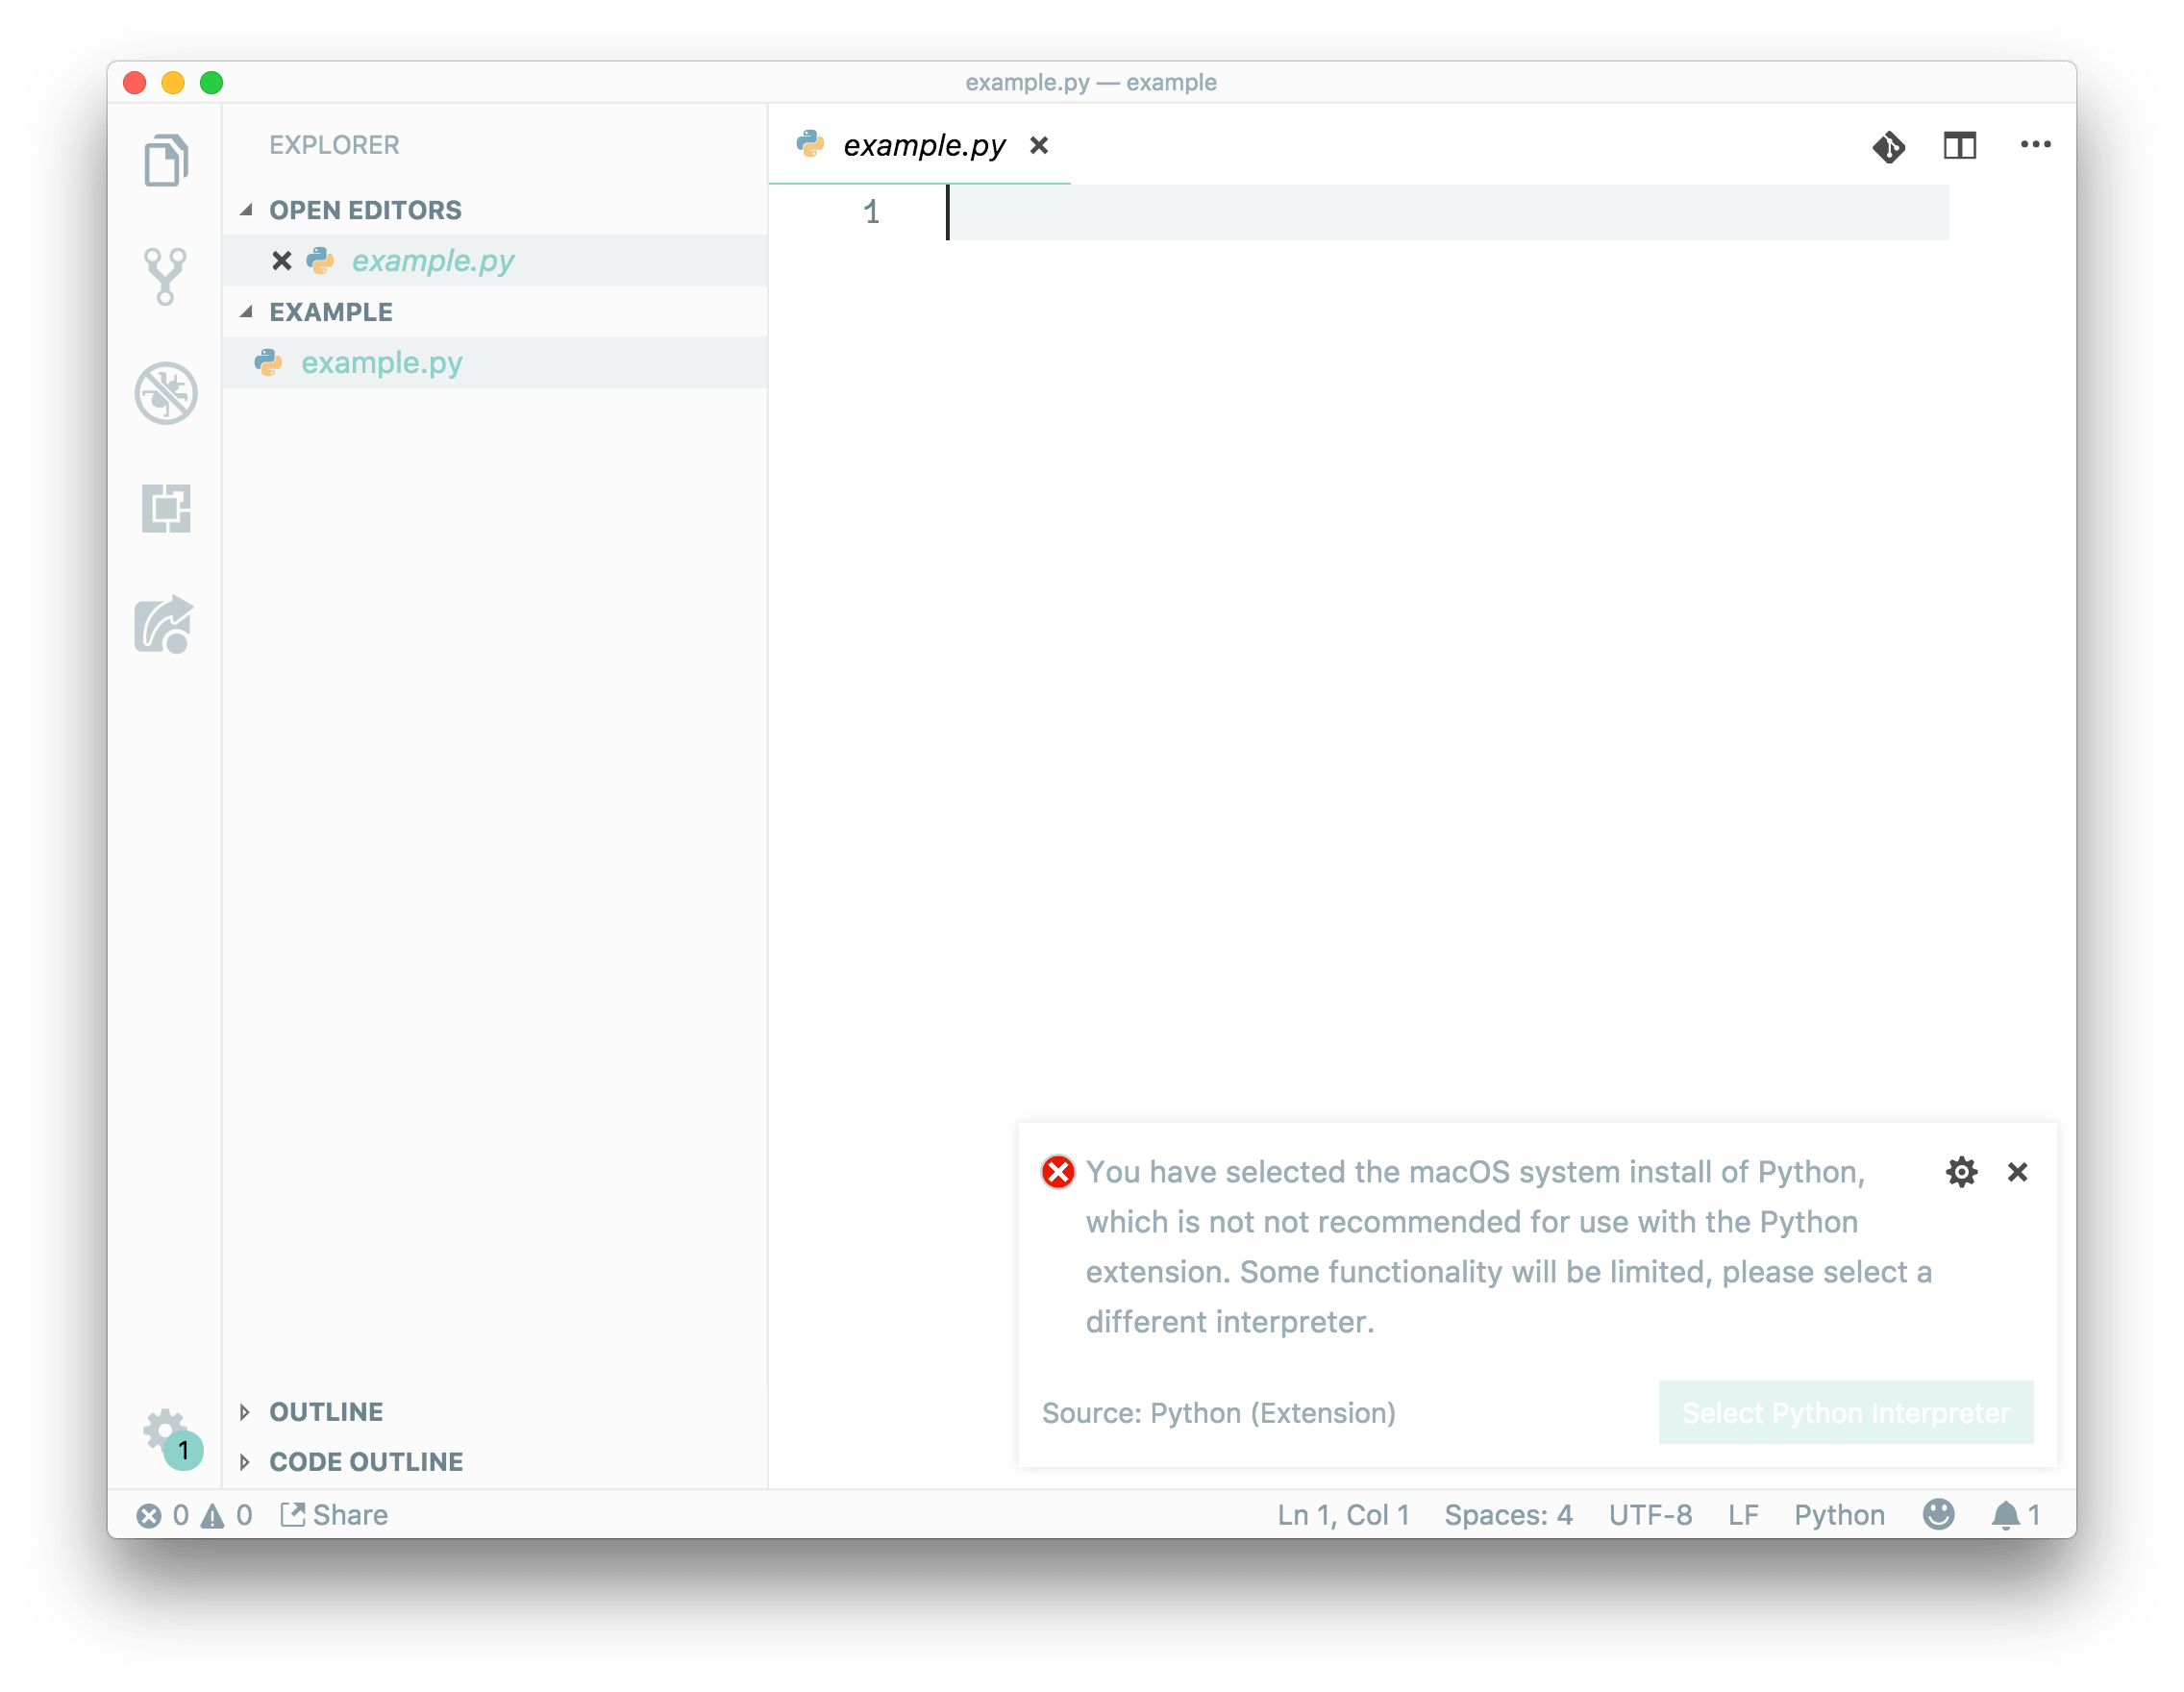
Running jupyter in Visual Studio Code
Select our environment (same which we activate before)

You can paste this example to your python file:
#%%
print('hello')

#%%
import matplotlib.pyplot as plt
import matplotlib as mpl
import numpy as np

x = np.linspace(0, 20, 100)
plt.plot(x, np.sin(x))
plt.show()
We are ready to start a new notebook from vscode
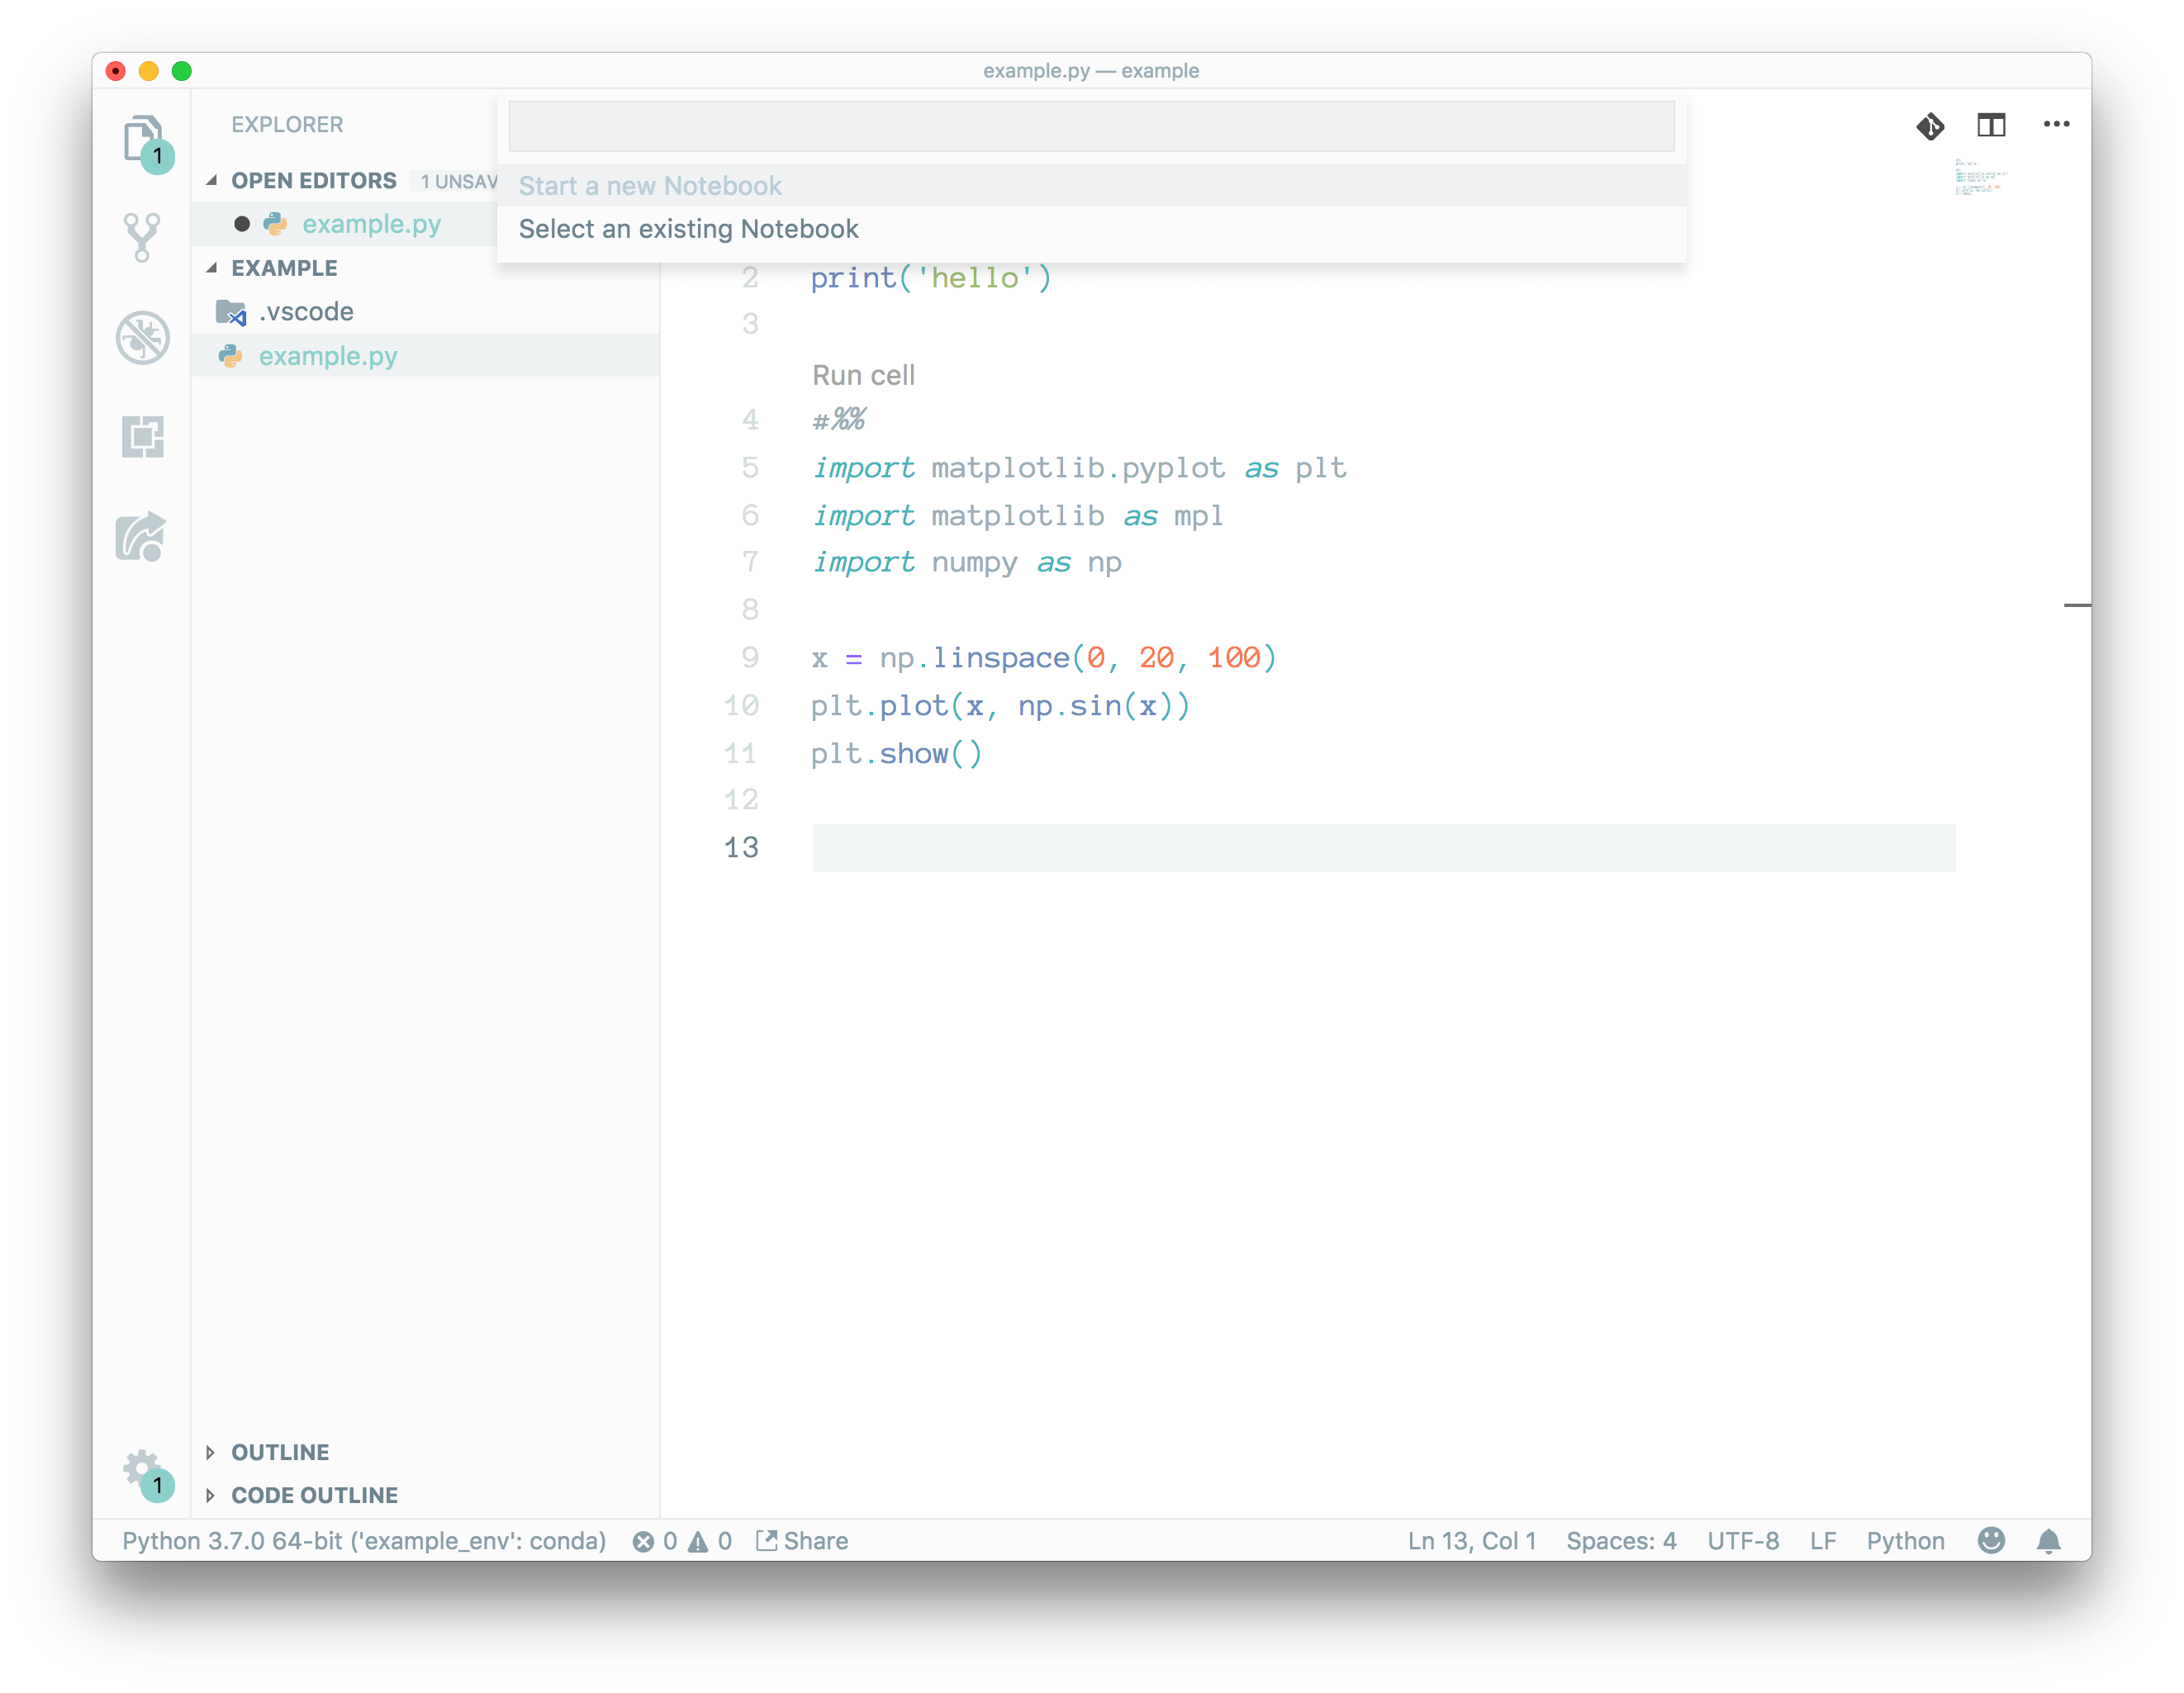
Now we can run cells directly from python code.
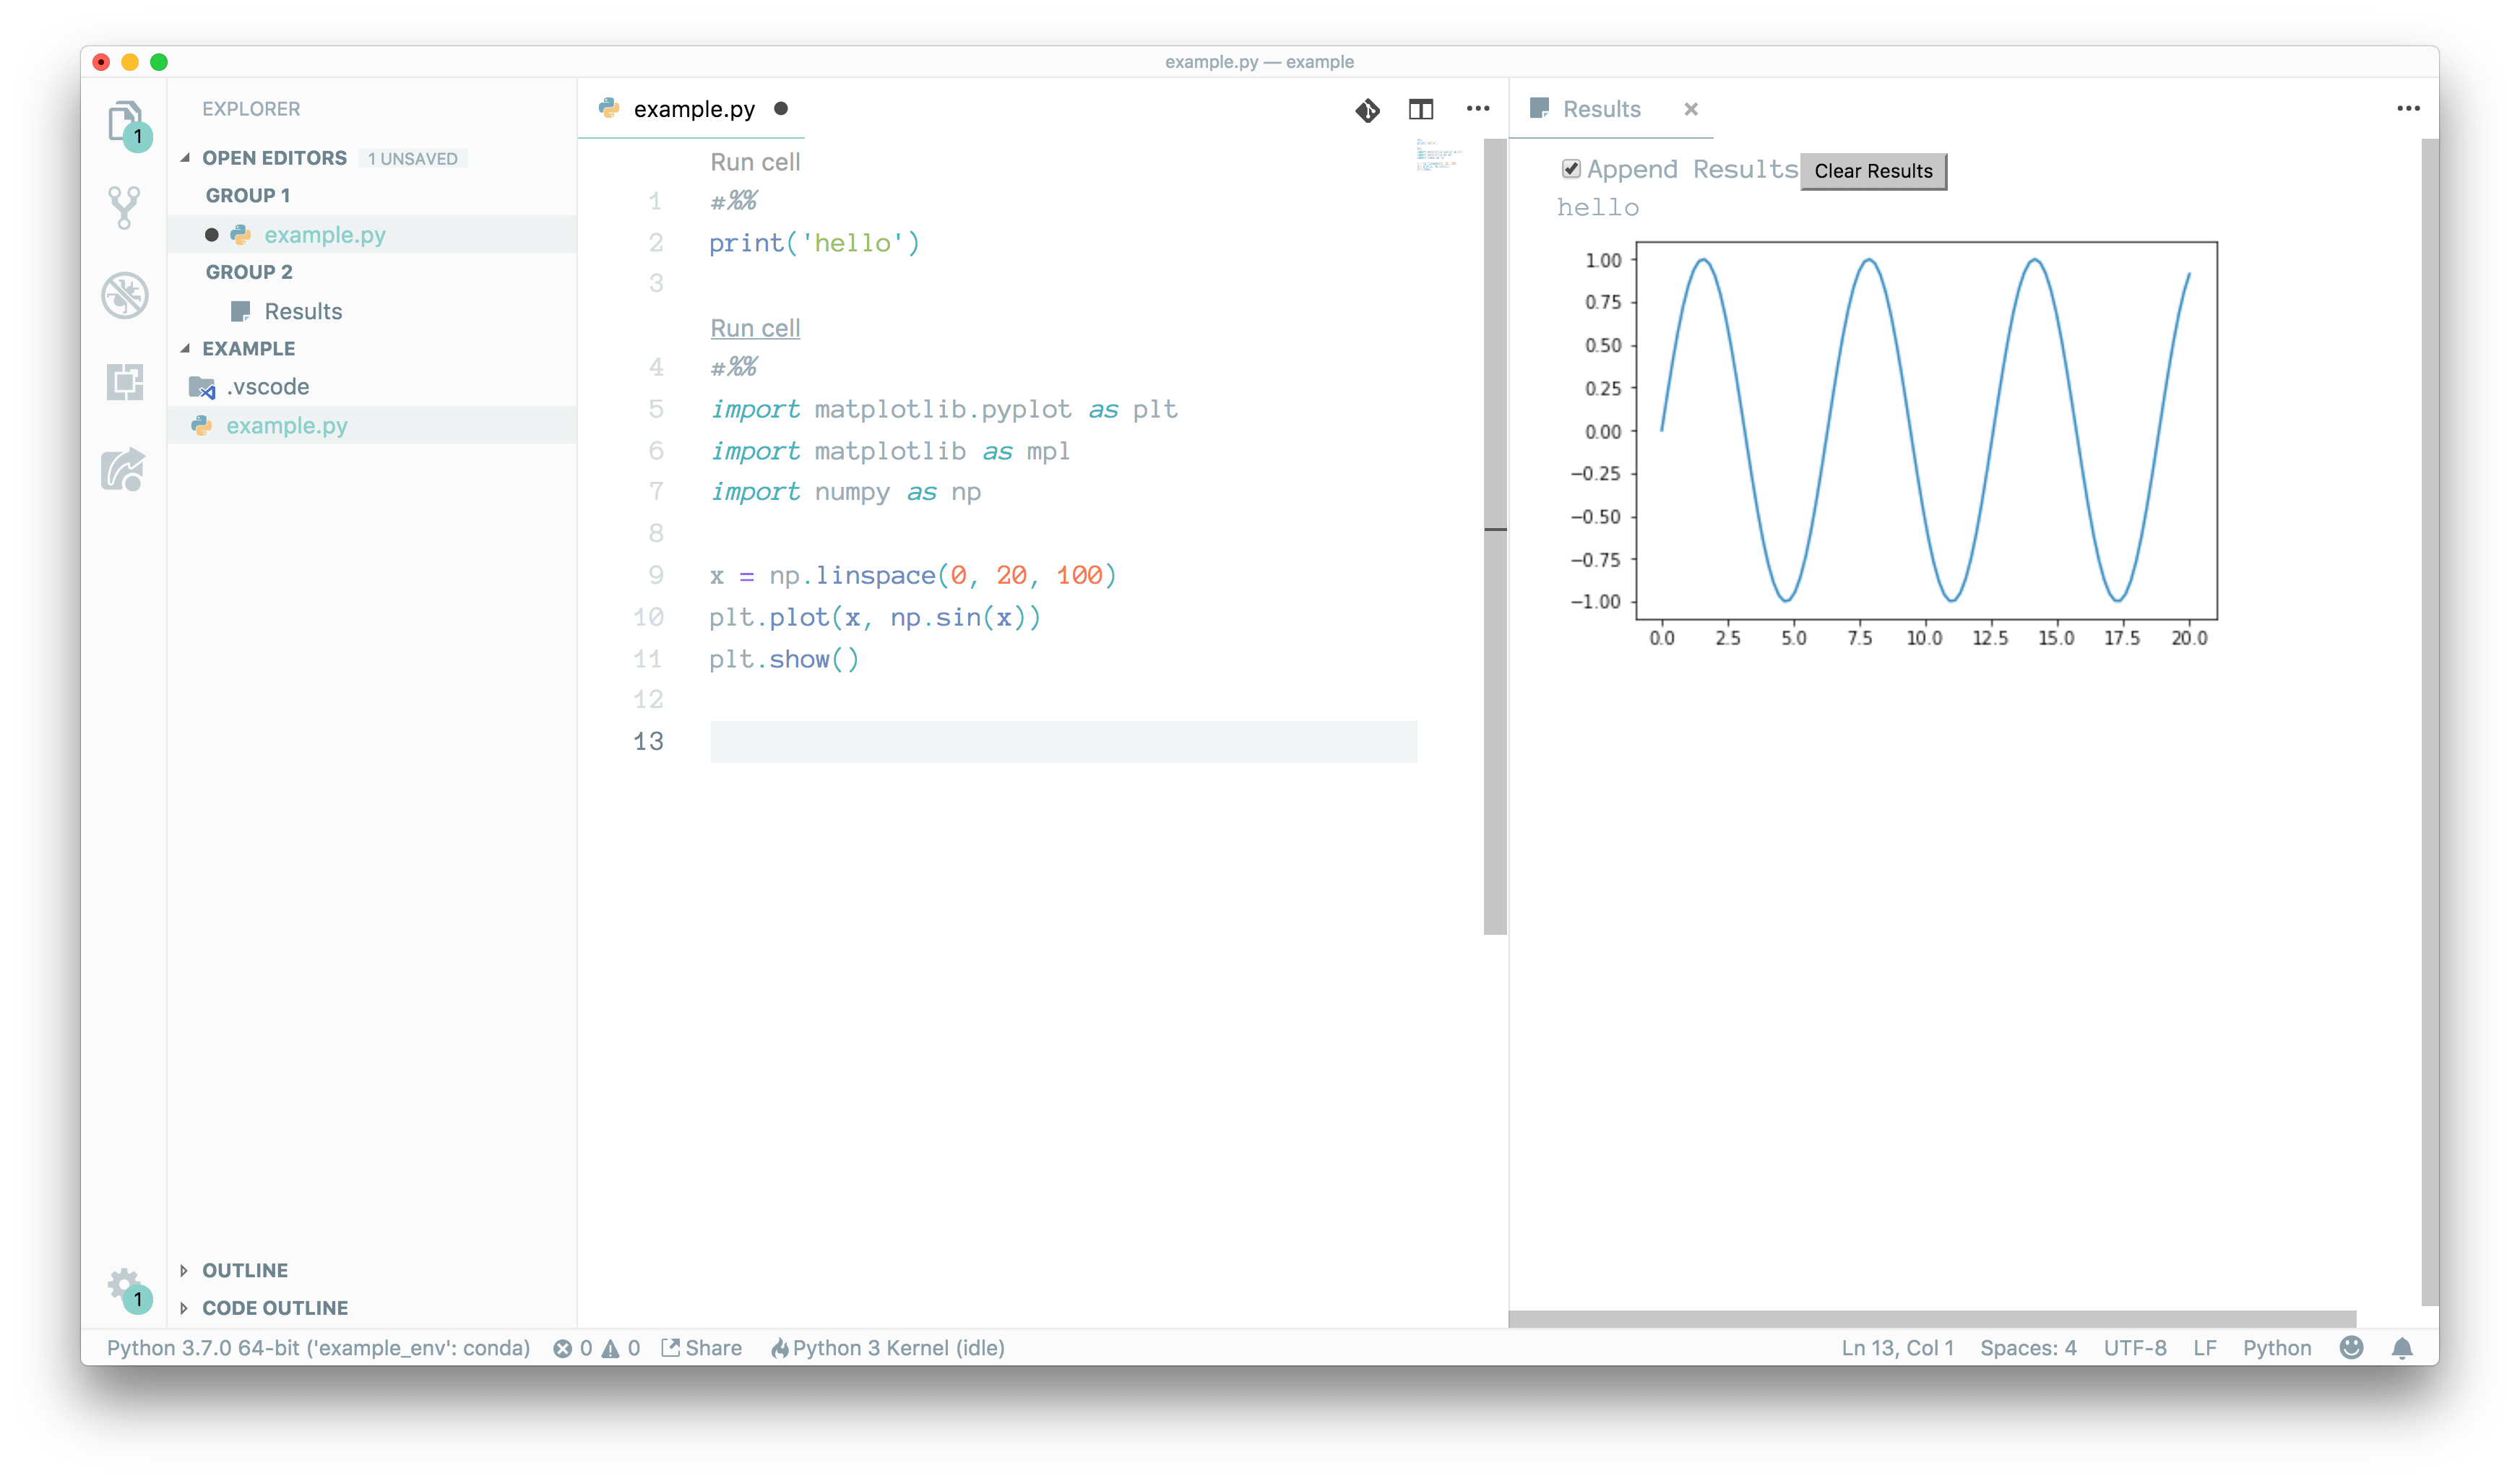
Like you see, on right side we have properly running Jupyter notebook. You can notice that #%% is a place holder
for runnable cells.
That’s it today, I hope all steps were well explained, in case of any issues, feel free to contact me over twitter.